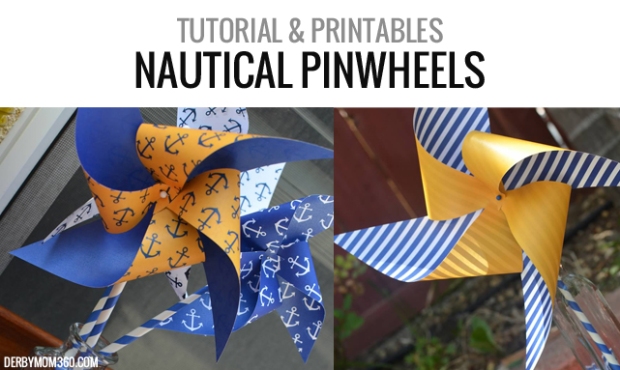
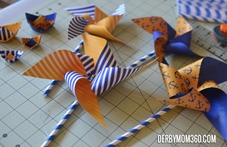
Pinwheels are a fun and playful addition to any party! These make such a cute table accent, party favor or just a project for the kids. You could make these for any themed party. I chose to print nautical designs for this party.
 PINWHEEL SUPPLIES:
DECORATIVE PAPER
SEWING PINS
PAPER STRAWS (OR PENCILS)
ROTATORY CUTTER & MAT
SCISSORS
RULER
NEEDLE-NOSE PLIERS
ELMER’S GLUE
For a more premium looking pinwheel, you’ll want to print something different on each side of the paper. For this design I did navy strips or anchors on one side and sold yellow on the other side. You can download my full page designs here:
Printable: Blue Anchors on Gold
Printable: White Anchors on Blue
Printable: Blue Anchors on White
Printable: White & Blue Stripes
Printable: Blue Solid
Printable: Gold Solid
You’ll want to print out as many double sided pages on letter sized paper as you’d like to make pinwheels. They can be as large as 8″x8″ or as small as you’d like.
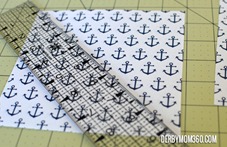
 First, you’ll want to trim off any unprinted area on the page. My printer leaves about 1/8″ that is not printable space and needs to be cut off. I prefer to use a rotary cutter and ruler to get a clean line but scissors are also fine.
Once you have only your beautiful printed designs on both sides with no white edges, you’ll want to cut the sheet down to a square. 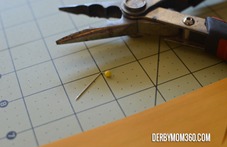
 5″x5″ makes a pretty nice sized pinwheel but you can play around with it. Any size square will work. For my party, I made a couple big ones and a couple of smaller ones. If you go 4″x4″ or smaller you can make two per page. For those who would rather trace a pattern, Oh Happy Day has a great printable pattern for pinwheels.
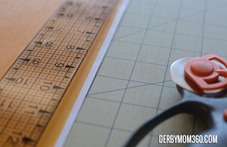
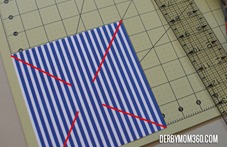
If you’re going the more free flow method, once you have your square, you’ll need to make slits to fold the points in. You’ll start at one corner with the ruler laid flat and have it line up on a diagonal to the other corner so there is a 45 degree angle on either side of the ruler. I made the cut about .5″ shorter than half a side. Meaning if I did a 6″x6″ I made the slit about 2.5″ long. The red lines on the image to the right show where I would cut.
Next you will fold every other point into the center. So I don’t get confused, I fold in the point to the right of the cut on each corner. 
 Also, when you fold them in, go a little passed the center mark with the point so you have enough to put the pin through to tack it down. I found through trial and error it was a bit easier to primp the pin first and the poke it through the 5 layers of paper and then the paper straw. I also found the pins with the round plastic heads looked a bit better than a traditional pin, though either will do just fine.
 S
S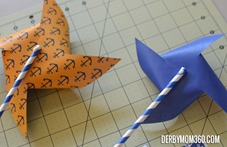 o once all 4 points are folded to the center area and have overlap, poke the pin through all points and the back layer and then through the paper straw. I trimmed down the end of the pin with my wire cutters and then added a dab of Elmer’s glue to the exposed edge so that once the glue dried, there was a clear protective covering over that part which could be a bit scratchy and could also fall out with use. If you choose to go with a pencil, you will not need to do the glue or the crimping, you’ll just poke it right into the eraser and cut the end down. I had paper straws that were perfect for my theme so I decided to do the extra steps.

CONGRATULATIONS!
You have completed your first pinwheel! Let the glue dry and you’re ready to use them!
