
As I prepare to fly cross-country with my 18-month old son, I am planning one of the most challenging parts of our trip… What we might do on the plane from San Diego to Boston. He’s just recently started to take an interest in cars and I thought making one of these fun car mats sized just for an airline tray table would be perfect for the trip.
There are tons of these available for sale online but I found it only took a couple hours to make and was easily made from scraps lying around the house. I bought a couple of dollar store matchbox cars and VOILA! For just a few dollars I had a great travel toy ready for my airplane arsenal of activities.
Listed below you’ll find your fabric needs. I listed the basic idea of what the fabric is for and then what kind I used in this project. Any of these could really be any fabric at all so feel free to get creative. I figured some heavier fabrics would make it a bit more durable and long lasting.
SUPPLY LIST
Back Fabric: Striped Colorful Canvas (17”x10”)
Top Fabric: Green Leaf-Patterned Cotton (17”x10”)
Car Slot Fabric: Turquoise Corduroy (2x 8”x10”)
Road Fabric: Gray Suiting (2x 2”x10”)
Yellow Fabric: Yellow Cotton (Very little)
Wonder Under Fusible
Additional Accents and Appliques (Optional): Orange Robots
I did some searching around on the internet and found that not all planes have the exact same tray table size but there seemed to be some conscious that 16.5”x9.5” was average so I sized everything for this play mat off of that. You could certainly make it bigger or smaller and just tweak your dimension. You’ll want about 2-3” of width for each car slot. This mat has 6 car slots.
CUT & PREP

To begin, you’ll want to prep cut all your fabric for the project. I cut out the Top and Back and Car Slot fabric all to the exact sizes list above. I cut anything that will be appliqued on slightly larger than I will use and iron on my Wonder Under before cutting. I like to cut everything on a healing mat with a ruler and a rotary cutter. It is the only way I am able to get nice clean lines.
CAR SLOTS
You’ll want to do all parts of the top play mat surface first which would be the car slots, roads and any top applique. We’ll start preparing the car slots. Fold the Car Slot Fabric in half lengthwise with your right sides facing out, then press so now you have a 4”x10” piece of fabric. Then you’ll divide your piece into thirds however you’ll want to allow for a ¼” seam allowance on either side. You can easily do 3.5”, 3” and then 3.5” to use nice easy measurements or be more exact with your thirds and allowance if you prefer. Press along those measurements so that you will have guides for your car slots and appliques. You’ll be doing this for both of your pieces you cut, one for each end.
APPLIQUE
After the car slot fabric was properly pressed to show the sizing for each compartment, I added an applique on each end. This step is completely optional but I felt it made it more personalized and special. I frequently use scraps of this Robot Factory fabric in my son’s projects b/c it is super cute and it a really fun color and makes it so all of his stuff is uniquely his. I roughly cut out the shape I wanted then fused my Wonder Under and then cut my more precise piece to the exact size I wanted.
 TIP: When using Wonder Under in projects pull up a corner of the fusible backing before you finish cutting the exact shape. It keeps you from fraying the fabric after it is cut and you need to remove the backing. So in the example shown here, I ironed on the fusible, cut three sides, then pulled off some of the backing on the bottom and then cut my final side so the edge would be nice and clean.
I finished off my Robot applique by pressing it on keeping the ¼” seam allowance in mind when aligning it (so it was slightly more inward than center) and then finished the edge with a zigzag stitch.
 You can now pin the Car Slots into place with your raw (unfolded edge) lined up with the end of the Top Fabric (mine is the green leaf print). Then you’ll want to sew along your two creases you made as marks for you car slots. Backstitching several times at the folded end since that is the part that will get the most wear. I also did a stich on the outer edge that was just less than 1/8” allowance so it would be inside the finished seam allowance.

 Next for the road, I do all the same Wonder Under techniques and laid out a road pattern that looked pleasing to me before I did any ironing or stitching. I cut one strip of the road in half and made it so the cars would come out of their “garage” and onto the road. Get creative here. You could do as many or few roads as you like. Rotary, traffic lights, stop signs, whatever your kid is into or sounds rad to you! So the steps are attach fusible, cut to size, lay out all roads (Gray Suiting Fabric), iron into place and lastly follow it up with a zigzag stitch to keep it secure through future washings.

 The yellow dashes were much more labor intensive and I’m honestly not sure if I would do them again. Again, attaching Wonder under on the back, then using the rotary cutter to make the little lines. I used tweezers to work with the tiny pieces and put them in place, ironing them on one at a time. I put a tight zigzag stitch down the middle of each one. I found that I wasn’t doing great with the backstitching/knotting/any technique I tried for these tiny bits so I went ahead and just ironed on some one-sided fusible over the back to make sure that my poor backstitches seams wouldn’t come loose with wear.
 This is when my son got up from his nap and came in to “help” out a bit.
STRAP CLOSURE
This is now the time to make your strap. You could do one long piece that goes all the way around. You could do two shorter pieces of fabric or ribbon that meet in the middle. You could hand tie it, snap it, Velcro it, whatever is pleasing to you.
 I
I only had a couple of small scraps left of my green fabric so I went with two straps that wrapped around with a Velcro closure. This is also where I chose to add a custom label. I don’t do anything fancy, just an iron-on on a piece of ribbon but as my kids get older it will show them they were handmade, one-of-a-kind, just for them as opposed to a store-bought toy.
I folded and pressed my piece of fabric in half and then half again so there wouldn’t be any raw edges and then sewed all the way around to make a nice clean strap. Then I secured zelcros on either side.
You will secure the raw end (or ends) of your strap(s) down with the raw edge facing the same side as the top fabric raw edge so when you sew the top to bottom it will be sandwiched in between. I chose to put my straps right in the middle so when I folded up my loaded car mat it would be right in the middle. You can baste it right near the edge (smaller than ¼” seam allowance) so they stay in place for the next step.
FINISHING IT UP!
 Once you have completed your straps you’ll make your layer sandwich so your right sides are both facing in of the Back Fabric and your Top Fabric with all its appliques and pockets and straps and whatnot. You’ll want to leave a couple inches gap that is unsewn so you can turn it right side out.
TIP: A pin facing perpendicular to your normal direction at the open and close of the slot will help keep you from accidentally closing it up. In my early projects, I frequently had to seam rip a gap back in to turn the project. Doh!
Then turn the project right side out and top stich all the way around. I played around with it and found it worked out best for me to fold the car slots over first on each side and then roll it into thirds. Secure your strap and TA DA! Yer done! Add a couple of cars and you have made a beautiful handmade toy for your young child to enjoy on a plane or a travel location of their choice!
BON VOYAGE!


 I used two flags on the front door to set the mood for our guests. I put a string of eight just over the television to make the racing more festive.
 Here’s the printable template for your cut-outs. The PDF includes all the instructions you’ll need to assemble your Mario:
  were women so we went with seeding in the order that they RSVP-ed and did a male and female side of the bracket. That is totally random and arbitrary. You could have time trials to seed. Or ask people their level of experience. Whatever works for you.

 Next you’ll want to cut out some strips of cardstock. I liked the look of the brown more natural sheets but you could use anything. I cut these 2” wide. Again, just cut them the length of your paper. My paper was 11.5”. You’ll just need one strip for each ribbon, so three total for this project.
 Once you’ve fan folded it all, you’ll want to glue the two ends together on each side for you get a fully connected cylinder. You could use any glue or tape here but I find a glue gun easiest for the rest of the project so I used that.

 Then the last part is to prep and affix the lower ribbon portion. I folded my cardstock at an angle to look like ribbon. Then I cut two strips of ribbon, slightly longer than each piece and glued them into place and let them hang over the end. Once that glue dried, I cut out a triangle on the bottom to give them a nice finished look. I used about 2 feet of white 1” wide ribbon but you could really use any scraps you have lying around.
 Lastly, I laid down a good portion of glue at the folded end and affixed the back of my starburst to it. I head it in place for a bit until the glue started to set. That’s it! You have one beautiful homemade ribbon. I made one first to get the hang of it and then assembly lined the rest of them doing each step at the same time.
 Tournament so it seemed like a good topic to share here.
 This entry is linked to all the different parts which include tutorials, links and downloads on the following:
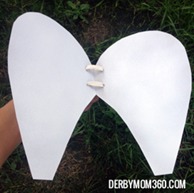

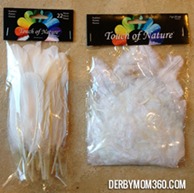 Now it’s time to plug in your glue gun and get ready for the fun part: FEATHERS!
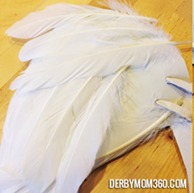
 I started with one really nice feather pointing down to be the end. Then two that kind of follow the curve of the wings. Even though the wings don’t come down to a point in the pattern, the feathers can make it so the bottom has a nice point to it. You’re going to start from there and just keep working your way up, overlapping the next tier over the top inch or two of the last one so they look full.
 Meaning, once you get to the last tiers near the top you’ll be going almost perpendicular to the direction your first feather was placed.
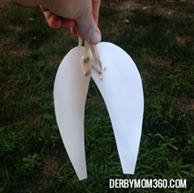
 Your wings are nearly completely. The top side should be looking full and beautiful now and you’ll want to flip them over to do a light covering over the back side. On this side, the tiers can be more spread out and the downy feathers can be much more thinly placed if needed. The idea is just that when you see it coming up over your baby’s shoulder it looks full and feathery. So the most important part to fill more fully on the back side is the rounded higher part since you will see it in any front facing picture of your babe. Make sure as you are covering this side with feathers the keep the arm loops pulled away and free of glue.
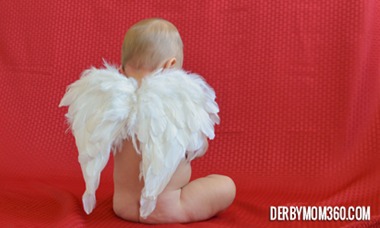 CUPID HAS ARRIVED!
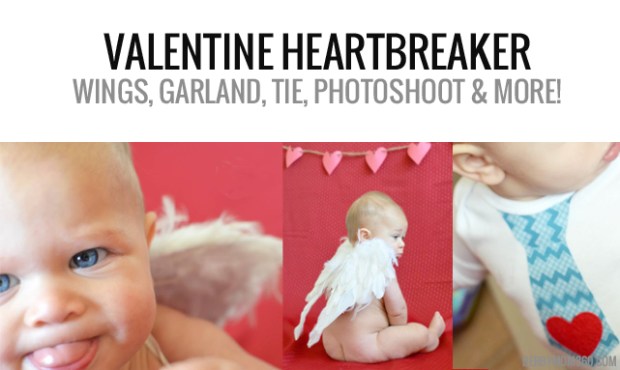


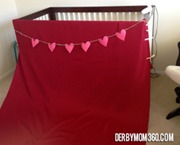

 Now you’re ready to start attaching your bunting. I chose to hang my banner in two lines but there’s no reason why you can’t string it all in one either. It just depends on the size of your cake.
 LET THEM EAT CAKE!
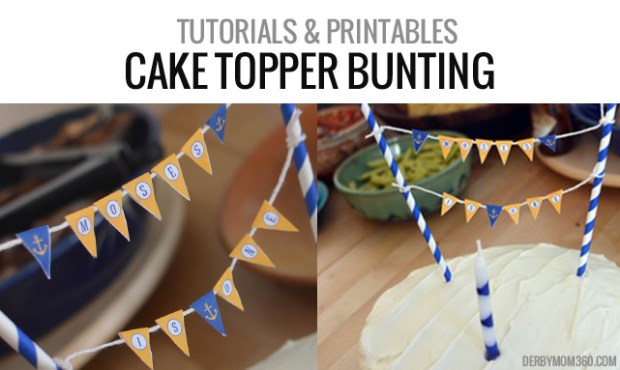
 Now you’re ready to start stringing your bunting. I chose to hang my banner in three lines but there’s no reason why you can’t string it all in one either.
 FINISHED!