Here’s what you’ll need:
Construction Paper: Blue, Red and Yellow (2 strips of 2.5”x12” each color)
Cardstock (3 strips of 2” x 11”)
Ribbon (1” x 24”)
Hot Glue Gun
Printable Centers (see below) or homemade inserts of your choosing
To begin, cut two pieces of construction paper that are 2.5” wide x the longest length. My paper was 12” but whatever you have is fine. I wanted pretty large awards. If you’d like yours to be smaller, cut the width of these two strips narrower. I cut out two strips of all three colors.
 Next you’ll want to cut out some strips of cardstock. I liked the look of the brown more natural sheets but you could use anything. I cut these 2” wide. Again, just cut them the length of your paper. My paper was 11.5”. You’ll just need one strip for each ribbon, so three total for this project.
Then you’ll start crimping your construction paper, meaning that you’ll want to fan fold it back and forth. There’s no exact size here. I found that I liked the look of a little tighter fold but you can do whatever you’d like here. Once you start folding one color, you’ll try to keep the size of your folds the same size each time for both strips.

 Once you’ve fan folded it all, you’ll want to glue the two ends together on each side for you get a fully connected cylinder. You could use any glue or tape here but I find a glue gun easiest for the rest of the project so I used that.
The next bit is probably the trickiest portion of this award project. You’ll want to bring on edge of the cylinder all together and lay it flat. The other edge will fan out and become the outside of the ribbon. It took both hands at first to keep it held in that position. Then once you have it properly gathered, you’ll grab your glue gun and put a good blob of hot glue in the center. You’ll need to keep holding the starburst in place while the glue dries. I just held it and blew on it for a about two minutes. After my first award, I realized I could wedge heavier objects on a couple sides to keep it from moving while it dried. Whatever works, you just want the glue to be hard before you release it.
While that is drying, you can prep your inserts. I made mine kind of funny and full of inside jokes for my group of friends. I have a more generic one here that is more likely to meet your needs. Just cut these out and they will serve as your center inserts. I chose to print them on cardstock so the paper would be stiffer to hold up to the hot glue.
Next you’ll want to hot glue the insert to the appropriately colored construction paper starburst. I did First (Grand Champion sounded more regal) in blue, Second in red and Third in Yellow. I flipped my starburst over and found the side without the glue glob to be more flat and easier to affix the center circle nice and flat. I hot glued in the center of the circle and then much more thinly near the perimeter so it would be on snuggly but not show any lumps of glue.


 Then the last part is to prep and affix the lower ribbon portion. I folded my cardstock at an angle to look like ribbon. Then I cut two strips of ribbon, slightly longer than each piece and glued them into place and let them hang over the end. Once that glue dried, I cut out a triangle on the bottom to give them a nice finished look. I used about 2 feet of white 1” wide ribbon but you could really use any scraps you have lying around.
 Lastly, I laid down a good portion of glue at the folded end and affixed the back of my starburst to it. I head it in place for a bit until the glue started to set. That’s it! You have one beautiful homemade ribbon. I made one first to get the hang of it and then assembly lined the rest of them doing each step at the same time.
I found some cute Mario Kart trinkets at Ross and affixed each award to the prize as a “trophy” for the tournament top finishers. I have a very competitive group of friend and I felt like the awards made it so there was more on the line. There are prizes and titles to be won or lost! Makes the stakes higher.
I’d love to see how yours turned out. Post to the Flickr Group to share your creations.

 I used two flags on the front door to set the mood for our guests. I put a string of eight just over the television to make the racing more festive.
 Here’s the printable template for your cut-outs. The PDF includes all the instructions you’ll need to assemble your Mario:
  were women so we went with seeding in the order that they RSVP-ed and did a male and female side of the bracket. That is totally random and arbitrary. You could have time trials to seed. Or ask people their level of experience. Whatever works for you.

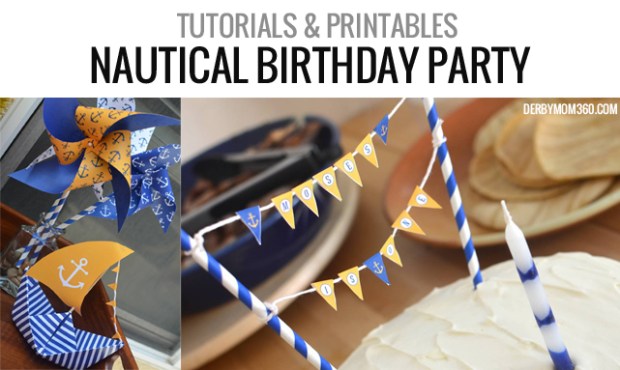
 Tournament so it seemed like a good topic to share here.
 This entry is linked to all the different parts which include tutorials, links and downloads on the following:
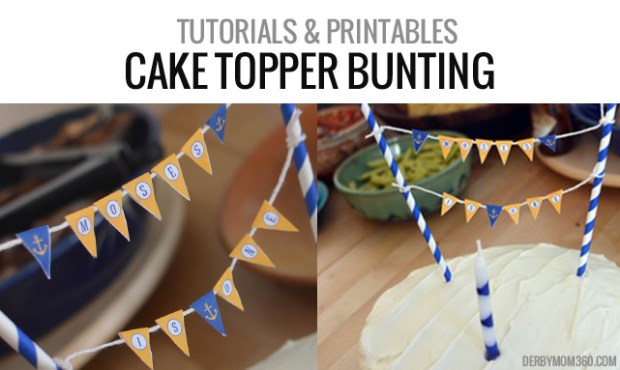
 Now you’re ready to start attaching your bunting. I chose to hang my banner in two lines but there’s no reason why you can’t string it all in one either. It just depends on the size of your cake.
 LET THEM EAT CAKE!
 Now you’re ready to start stringing your bunting. I chose to hang my banner in three lines but there’s no reason why you can’t string it all in one either.
 FINISHED!
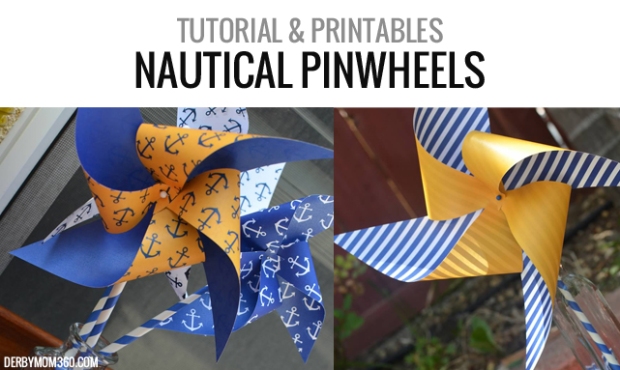

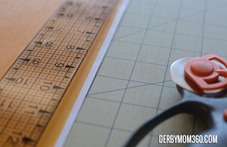 First, you’ll want to trim off any unprinted area on the page. My printer leaves about 1/8″ that is not printable space and needs to be cut off. I prefer to use a rotary cutter and ruler to get a clean line but scissors are also fine.
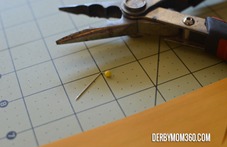
 5″x5″ makes a pretty nice sized pinwheel but you can play around with it. Any size square will work. For my party, I made a couple big ones and a couple of smaller ones. If you go 4″x4″ or smaller you can make two per page. For those who would rather trace a pattern, Oh Happy Day has
 Also, when you fold them in, go a little passed the center mark with the point so you have enough to put the pin through to tack it down. I found through trial and error it was a bit easier to primp the pin first and the poke it through the 5 layers of paper and then the paper straw. I also found the pins with the round plastic heads looked a bit better than a traditional pin, though either will do just fine.
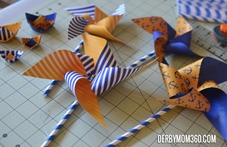 S
S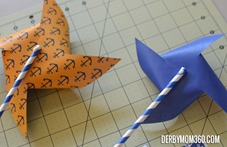 o once all 4 points are folded to the center area and have overlap, poke the pin through all points and the back layer and then through the paper straw. I trimmed down the end of the pin with my wire cutters and then added a dab of Elmer’s glue to the exposed edge so that once the glue dried, there was a clear protective covering over that part which could be a bit scratchy and could also fall out with use. If you choose to go with a pencil, you will not need to do the glue or the crimping, you’ll just poke it right into the eraser and cut the end down. I had paper straws that were perfect for my theme so I decided to do the extra steps.

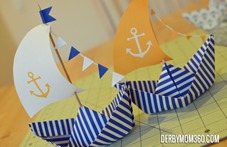
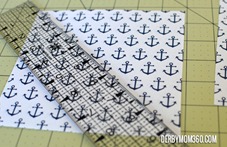
 To start, you will make a basic origami paper boat. They look pretty good made from a sheet of letter sized paper or you can play around with the size and ratios. Print up one of the full page patterns from the buttons above and then trim off any extra white on the edges. I prefer to do this with a rotary cutter and a ruler but if you don’t have one you could just use scissors.
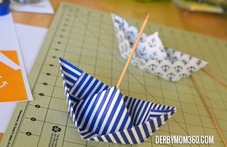 To apply the sail, you’ll need a mast. Take one of your sewing pins from the last project and poke a hole in the high point of the boat to make a start hole. Then you can poke the sharp end of the skewer through it. Then cut the skewer down to your desired length. I used electrical tape to attach the end to the inside underneath of the boat.
 bottom of each sail. then I threaded them threw the skewer doing my best not to stretch the holes out too much so the sail stays tight to it.